Sơ đồ triển khai
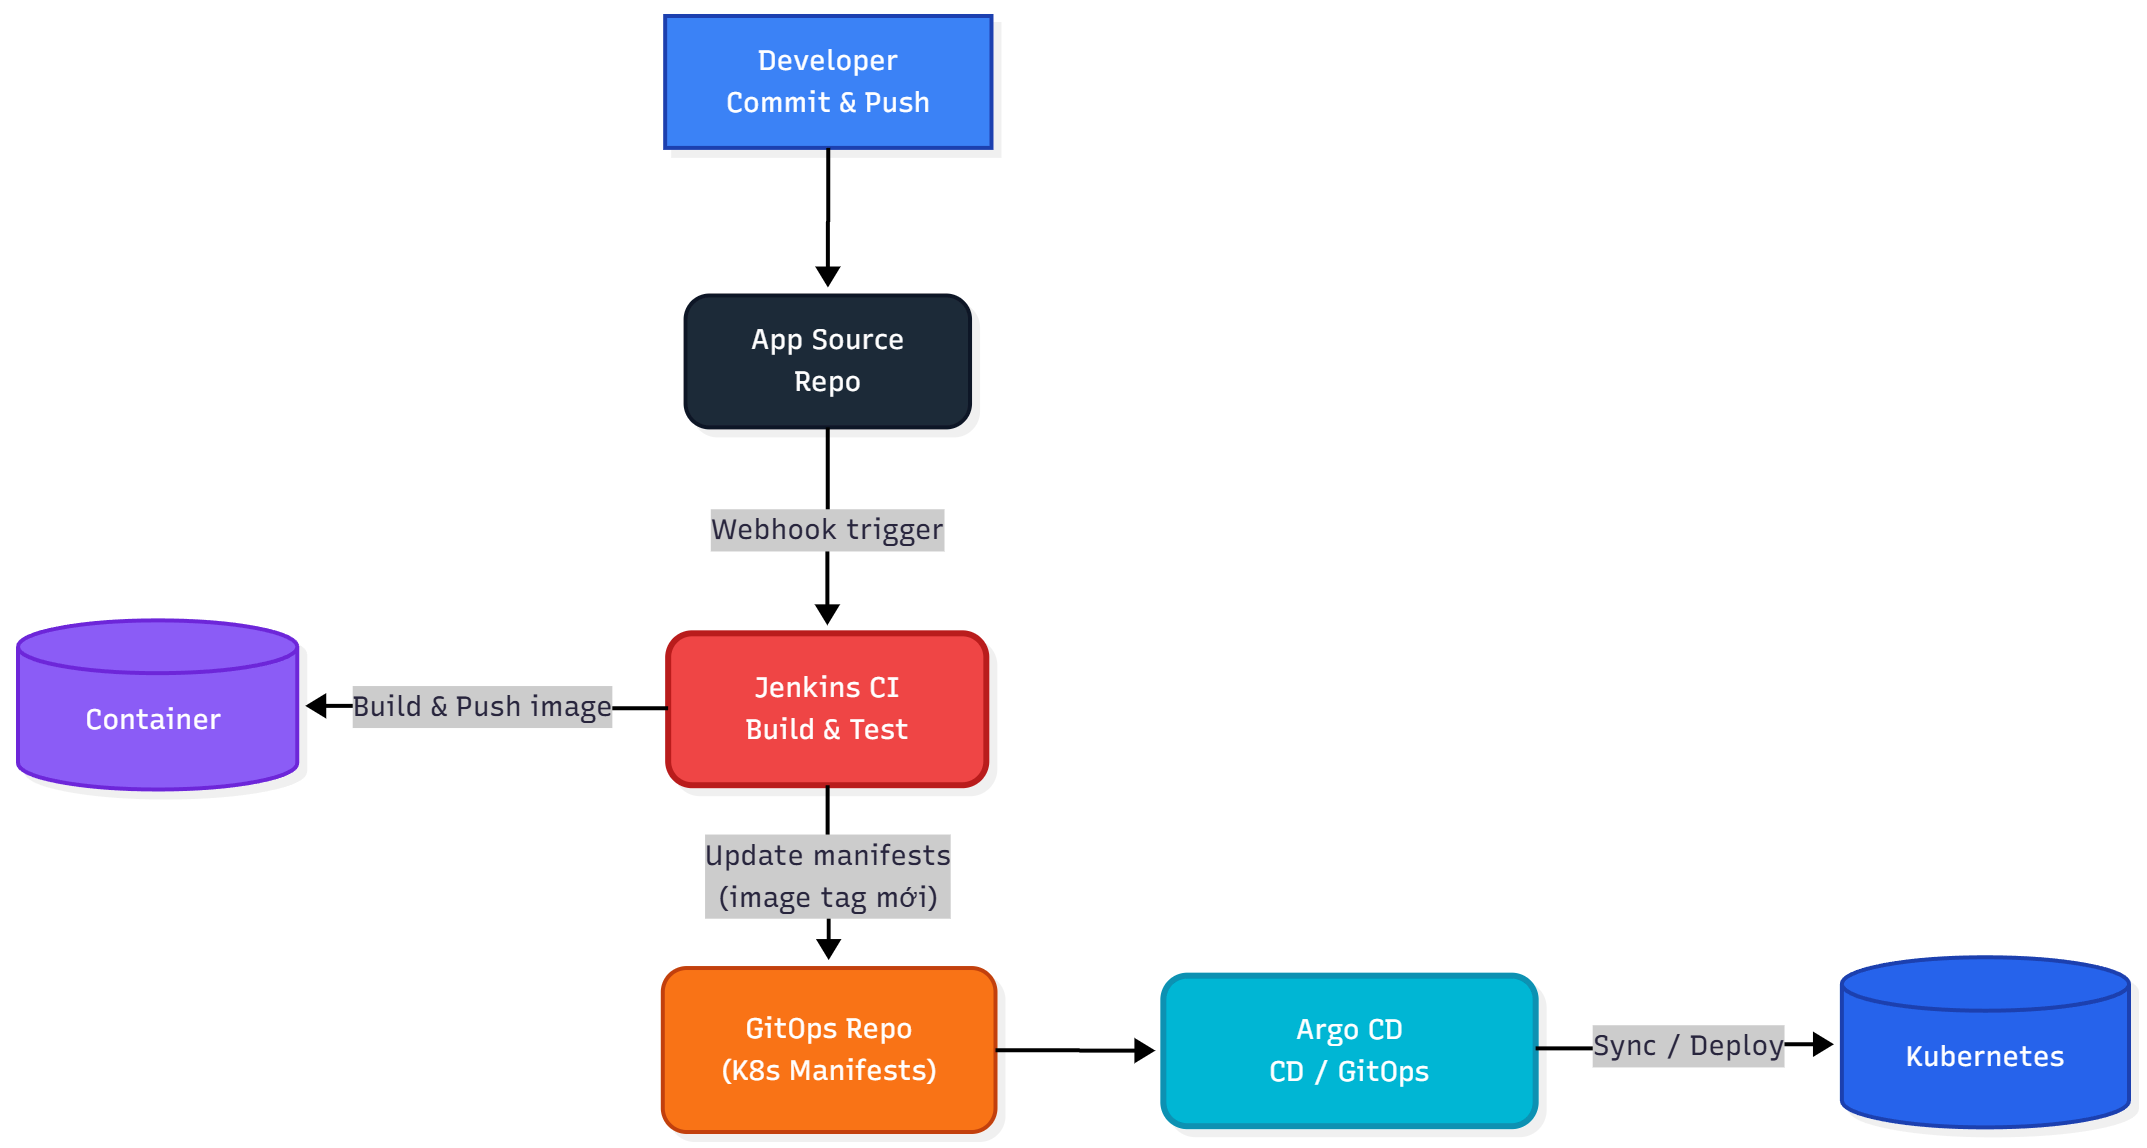
Triển khai ứng dụng từ Gitlab
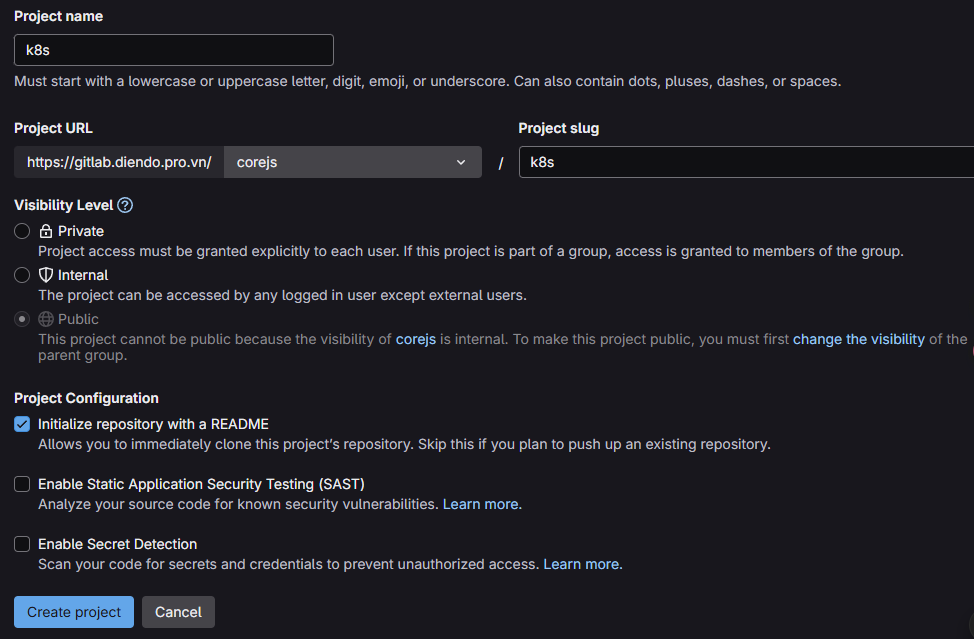
Bước 1: Tạo project k8s chứa các file manifest để deploy lên k8s
Ở bài này ta tạm thời để project public ( triển khai project Internal hay Private sẽ triển khai sau)
trong gitlab Project -> Create Project -> k8s Visibility Level -> Public
Bước 2: Clone project về local
git clone http://gitlab.diendo.pro.vn/corejs/k8s.git
cd k8s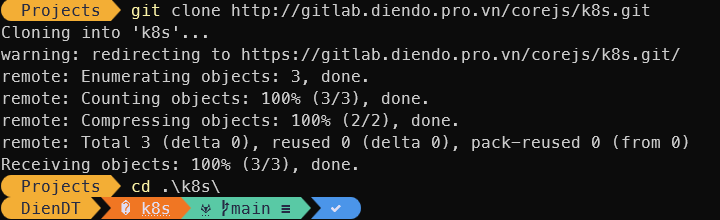
Bước 3: Copy các file manifest vào thư mục k8s
Bước 4: Chỉnh sửa Jenkinsfile trong project bỏ phần Deploy lên k8s
Nội dung Jenkinsfile
pipeline {
    agent any

    environment {
        REGISTRY_URL        = "registry.diendo.pro.vn"
        REGISTRY_CREDENTIAL = "docker-registry-creds"  // ID trùng với Jenkins
        REGISTRY_PATH       = "corejs/corejs"

        // Tag version theo số build của Jenkins, ví dụ v1, v2, v3...
        IMAGE_TAG           = "v${BUILD_NUMBER}"

        // --- Application & Image Naming ---
        APP_NAME            = 'corejs' // Base name for images and containers
        FRONTEND_IMAGE      = "${REGISTRY_PATH}/${APP_NAME}-frontend" // Image name for frontend
        BACKEND_IMAGE       = "${REGISTRY_PATH}/${APP_NAME}-backend"  // Image name for backend
        FRONTEND_CONTAINER  = "${APP_NAME}-frontend-app" // Fixed container name for frontend
        BACKEND_CONTAINER   = "${APP_NAME}-backend-app"  // Fixed container name for backend
    }

    stages {
        // --- Stage 1: Get latest code ---
        stage('1. Checkout Code') {
            steps {
                // Use Jenkins built-in SCM checkout step
                checkout scm
                echo "SUCCESS: Code checked out from GitLab."
            }
        }

        // --- Stage 2: Build Production Docker Images ---
        stage('2. Build & Push Docker Images') {
            parallel {
                stage('Frontend') {
                    steps {
                        dir('frontend') {
                            echo "🔧 Building Frontend: ${FRONTEND_IMAGE}:${IMAGE_TAG}"
                            sh "docker build -t ${FRONTEND_IMAGE}:${IMAGE_TAG} ."
                        }

                        withCredentials([usernamePassword(
                            credentialsId: env.REGISTRY_CREDENTIAL,
                            usernameVariable: 'REG_USER',
                            passwordVariable: 'REG_PASS'
                        )]) {
                            sh '''
                                echo "${REG_PASS}" | docker login ${REGISTRY_URL} -u "${REG_USER}" --password-stdin
                                docker tag ${FRONTEND_IMAGE}:${IMAGE_TAG} ${REGISTRY_URL}/${FRONTEND_IMAGE}:${IMAGE_TAG}
                                docker push ${REGISTRY_URL}/${FRONTEND_IMAGE}:${IMAGE_TAG}
                                docker tag ${FRONTEND_IMAGE}:${IMAGE_TAG} ${REGISTRY_URL}/${FRONTEND_IMAGE}:latest
                                docker push ${REGISTRY_URL}/${FRONTEND_IMAGE}:latest
                                docker logout ${REGISTRY_URL}
                            '''
                        }
                        echo "✅ Frontend image pushed successfully!"
                    }
                }

                stage('Backend') {
                    steps {
                        dir('CoreAPI') {
                            echo "🔧 Building Backend: ${BACKEND_IMAGE}:${IMAGE_TAG}"
                            sh "docker build -t ${BACKEND_IMAGE}:${IMAGE_TAG} ."
                        }

                        withCredentials([usernamePassword(
                            credentialsId: env.REGISTRY_CREDENTIAL,
                            usernameVariable: 'REG_USER',
                            passwordVariable: 'REG_PASS'
                        )]) {
                            sh '''
                                echo "${REG_PASS}" | docker login ${REGISTRY_URL} -u "${REG_USER}" --password-stdin
                                docker tag ${BACKEND_IMAGE}:${IMAGE_TAG} ${REGISTRY_URL}/${BACKEND_IMAGE}:${IMAGE_TAG}
                                docker push ${REGISTRY_URL}/${BACKEND_IMAGE}:${IMAGE_TAG}
                                docker tag ${BACKEND_IMAGE}:${IMAGE_TAG} ${REGISTRY_URL}/${BACKEND_IMAGE}:latest
                                docker push ${REGISTRY_URL}/${BACKEND_IMAGE}:latest
                                docker logout ${REGISTRY_URL}
                            '''
                        }
                        echo "✅ Backend image pushed successfully!"
                    }
                }
            }
        }
    } // End of stages

    // --- Post-build Actions ---
    // Actions to perform after the pipeline finishes
    post {
        always { // Always run these steps
            echo 'INFO: Pipeline finished execution.'
            // cleanWs() // Option to clean the Jenkins workspace
        }
        success { // Run only on success
            echo '✅ SUCCESS: Pipeline completed successfully!'
            // Add success notifications (email, Slack, etc.) here
        }
        failure { // Run only on failure
            echo '❌ FAILED: Pipeline failed!'
            // Add failure notifications here
        }
    } // End of post

} // End of pipeline
Bước 5: Push file Jenkinsfile
git add .
git commit -m "Push Jenkinsfile for Build and Push"
git push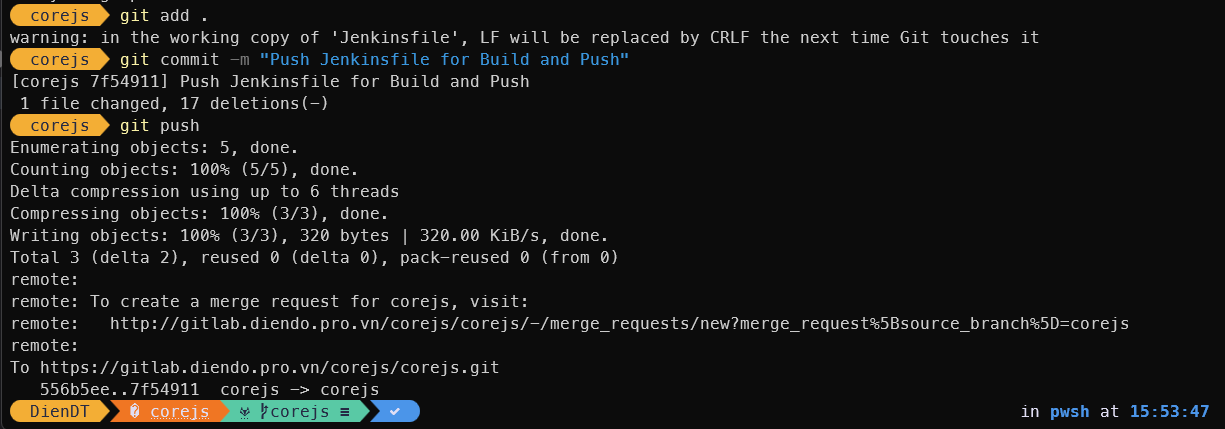
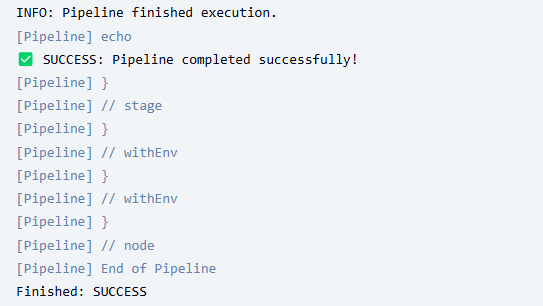
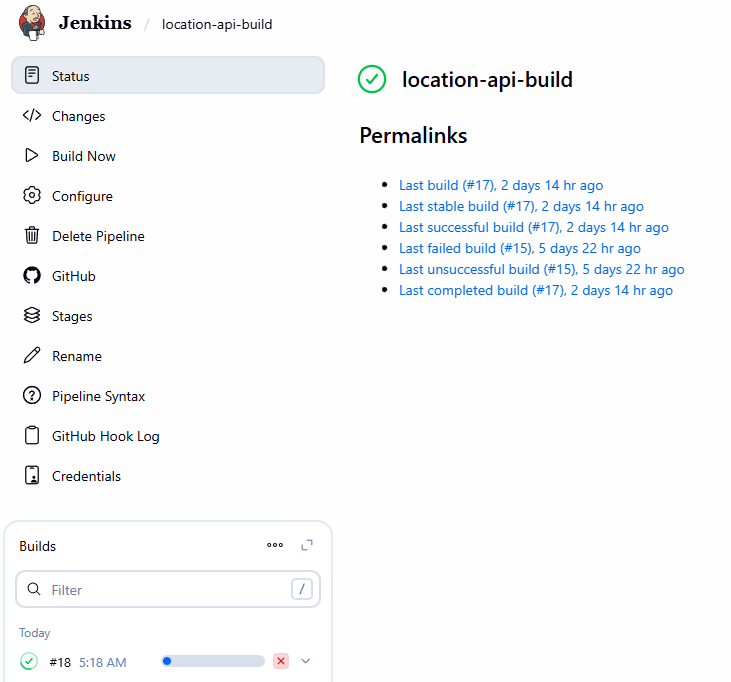
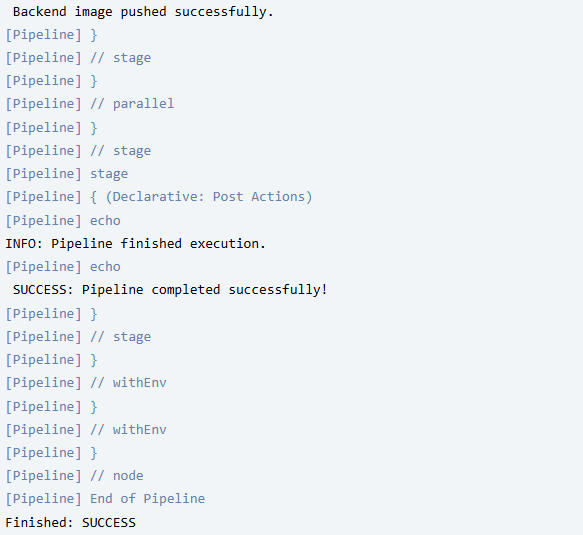
Bước 6: Kiểm tra Jenkins
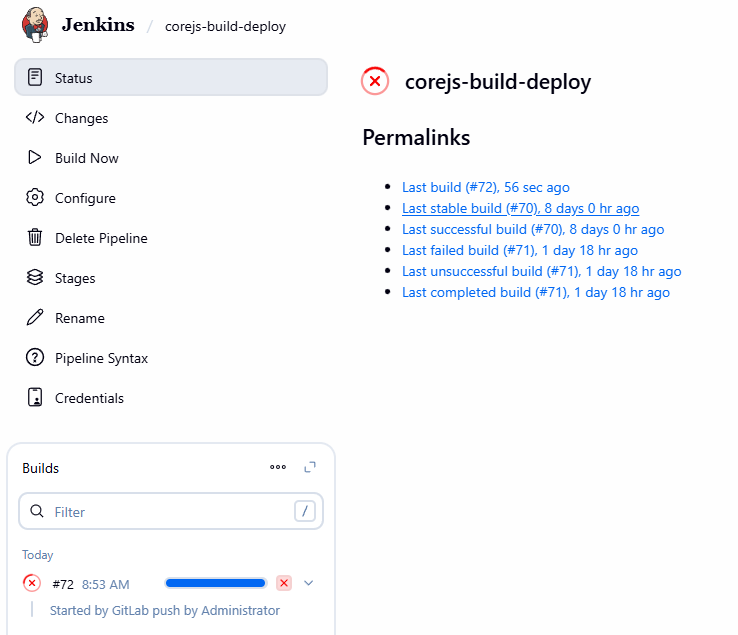
Đã push image lên thành công
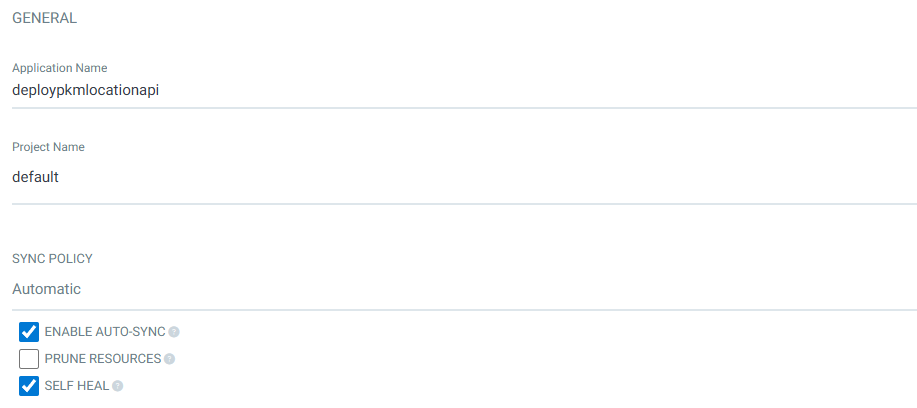
Bước 7: Cấu hình ArgoCD
Đăng nhập vào ArgoCD qua đường link: https://argocd.diendo.pro.vn và cấu hình như sau
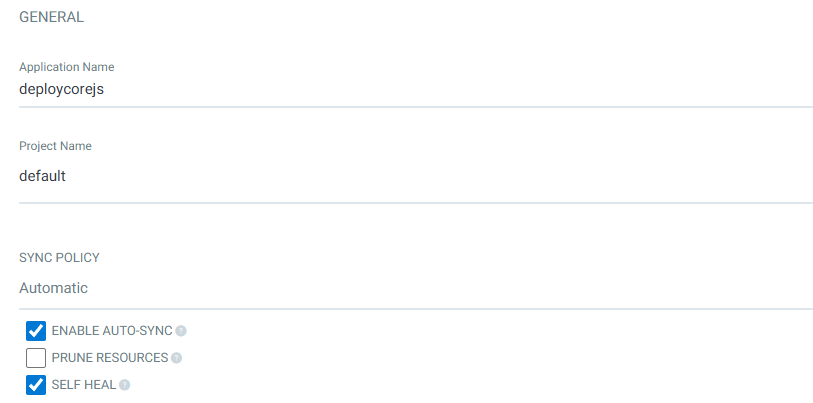
Lưu ý: Application Name chỉ được đặt tên bằng chữ cái viết thường
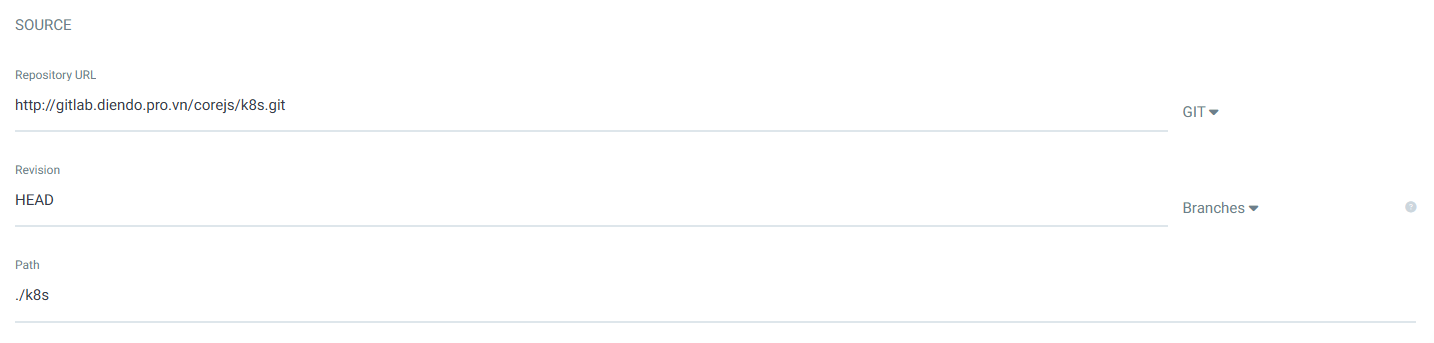
Repository URL: Link repo chứa các manifest
Revision: HEAD
Path: Đường dẫn để argocd theo dõi các thay đổi
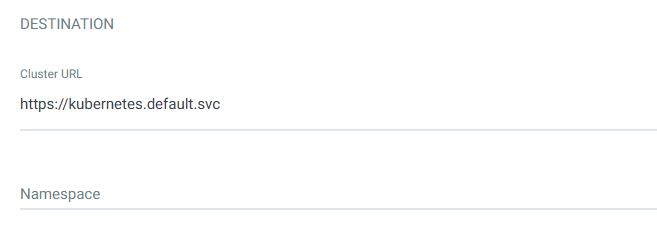
Create
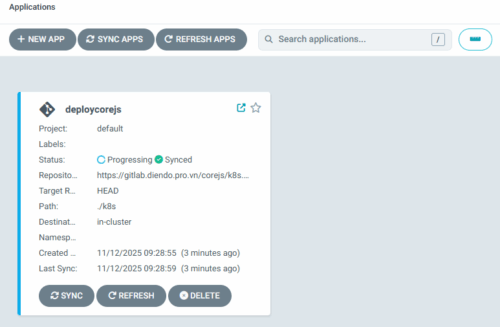
Đến đây đã deploy xong
Triển khai ứng dụng từ Github
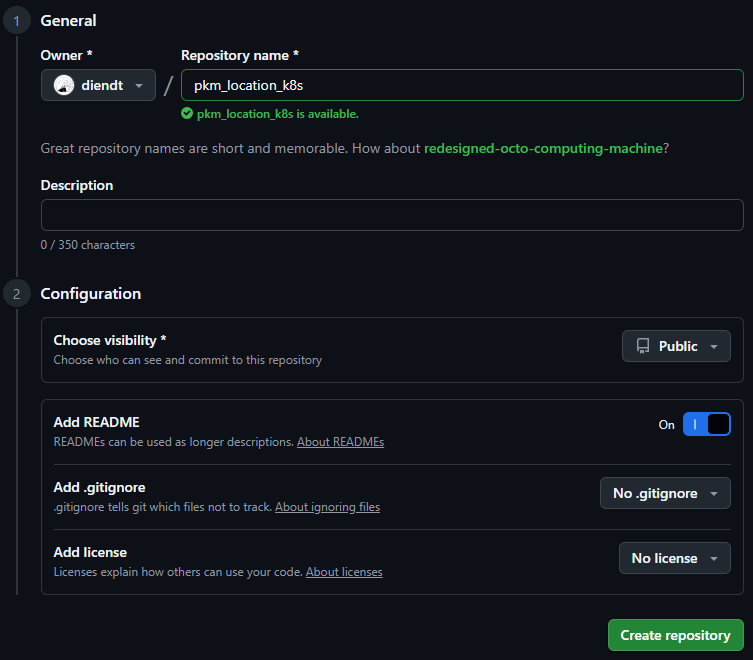
Bước 1: Tạo repositories pkm_location_k8s để lưu các manifest deploy k8s (visibility: Public)

Bước 2: Clone project về local, tạo thư mục k8s và copy các file manifest vào và push lên repositories
git clone https://github.com/diendt/pkm_location_k8s.git
cd pkm_location_k8s
mkdir k8s
#Copy file manifest vào k8s

git add .
git commit -m "Add file k8s"
git push orgin main
Bước 3: Sửa Jenkinsfile bỏ phần deploy lên k8ss
// Jenkinsfile - Simple Deploy to Docker Host (Cách 1: All-in-One)
// Builds production images and runs them on the host Docker daemon.
pipeline {
    // Run on the Jenkins controller itself, requires docker-cli installed via Dockerfile
    agent any

    environment {
        // --- Application & Image Naming ---
        REGISTRY_URL        = "registry.diendo.pro.vn"
        REGISTRY_CREDENTIAL = "docker-registry-creds"  // ID trùng với Jenkins
        REGISTRY_PATH       = "beobeo/location_api"
        // Tag version theo số build của Jenkins, ví dụ v1, v2, v3...
        IMAGE_TAG           = "v${BUILD_NUMBER}"
        // --- Application & Image Naming ---
        APP_NAME            = 'location-api' // Base name for images and containers
        BACKEND_IMAGE       = "${REGISTRY_PATH}/${APP_NAME}-backend"  // Image name for backend
        BACKEND_CONTAINER   = "${APP_NAME}-app"  // Fixed container name for backend

        K8S_NAMESPACE     = "pkm-api"
        K8S_CREDENTIAL_ID = 'k8s-config-file' // ID credential kubeconfig
    }

    stages {
        // --- Stage 1: Get latest code ---
        stage('1. Checkout Code') {
            steps {
                // Use Jenkins built-in SCM checkout step
                checkout scm
                echo "SUCCESS: Code checked out from GitLab."
            }
        }

        // --- Stage 2: Build Production Docker Images ---
        stage('2. Build & Push Docker Images') {
            parallel {
                stage('Backend') {
                    steps {
                        script {
                            withCredentials([usernamePassword(
                                credentialsId: env.REGISTRY_CREDENTIAL,
                                usernameVariable: 'REG_USER',
                                passwordVariable: 'REG_PASS')]
                                ) {
                                sh '''
                                    echo " Building backend image: ${BACKEND_IMAGE}"
                                    echo "${REG_PASS}" | docker login ${REGISTRY_URL} -u "${REG_USER}" --password-stdin
                                    docker build -t ${BACKEND_IMAGE}:latest .
                                    docker tag ${BACKEND_IMAGE}:latest ${REGISTRY_URL}/${BACKEND_IMAGE}:${IMAGE_TAG}
                                    docker push ${REGISTRY_URL}/${BACKEND_IMAGE}:${IMAGE_TAG}
                                    docker tag ${BACKEND_IMAGE}:latest ${REGISTRY_URL}/${BACKEND_IMAGE}:latest
                                    docker push ${REGISTRY_URL}/${BACKEND_IMAGE}:latest

                                    docker logout ${REGISTRY_URL}
                                '''
                            }
                        }
                        echo " Backend image pushed successfully."
                    }
                }
            }
        }

    } // End of stages

    // --- Post-build Actions ---
    // Actions to perform after the pipeline finishes
    post {
        always { // Always run these steps
            echo 'INFO: Pipeline finished execution.'
            // cleanWs() // Option to clean the Jenkins workspace
        }
        success { // Run only on success
            echo ' SUCCESS: Pipeline completed successfully!'
            // Add success notifications (email, Slack, etc.) here
        }
        failure { // Run only on failure
            echo ' FAILED: Pipeline failed!'
            // Add failure notifications here
        }
    } // End of post

} // End of pipeline
Bước 4: Push Jenkinsfile và kiểm tra trên Jenkins
git add .
git commit -m "Edit Jenkinsfile"
git push origin main
Bước 5: Tạo ứng dụng trên ArgoCD
Đăng nhập vào ArgoCD qua đường link: https://argocd.diendo.pro.vn và cấu hình như sau

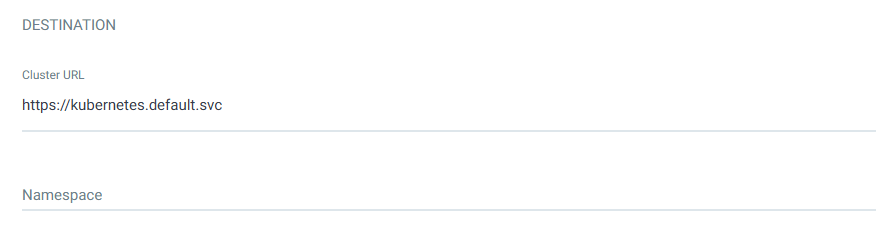
CREATE
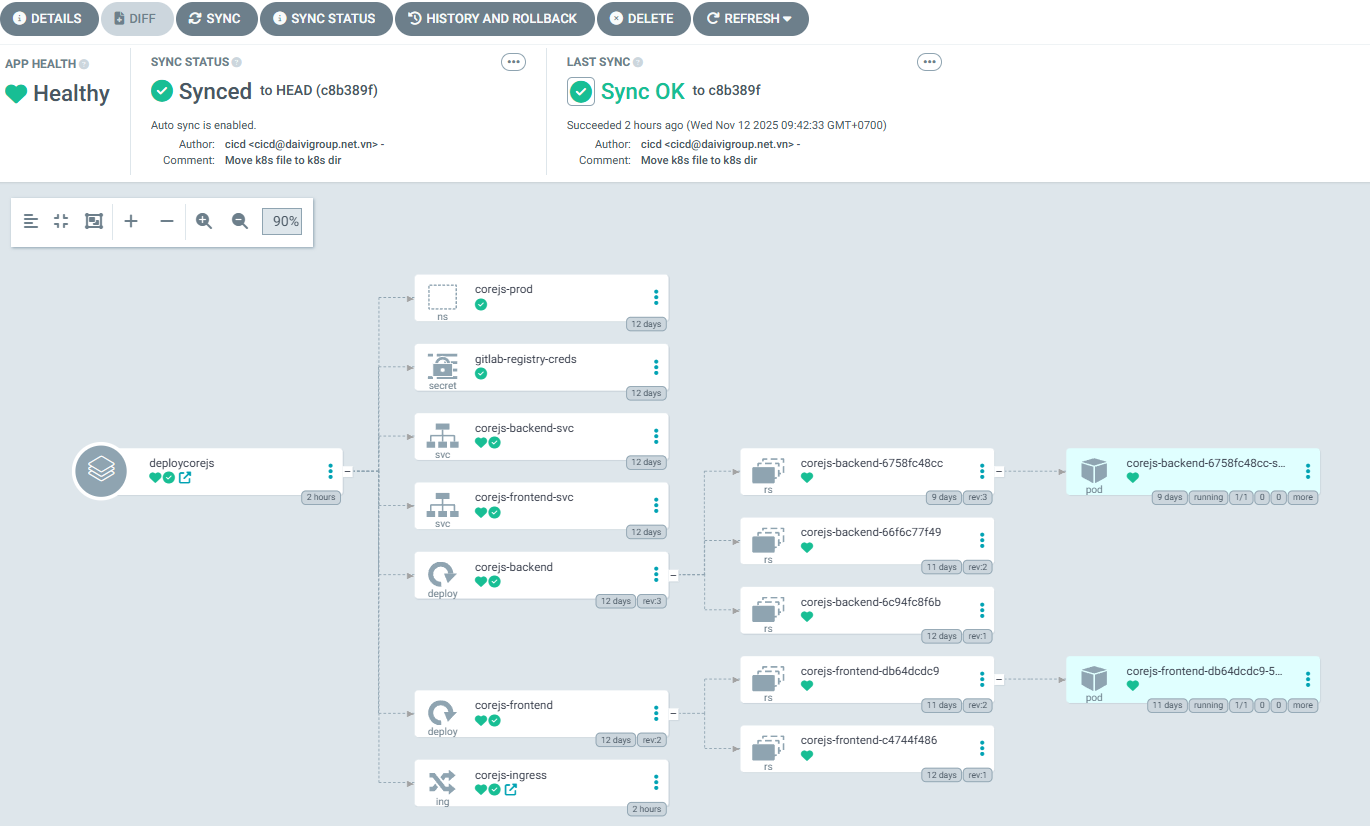
Bước 6: Kiểm tra ArgoCD
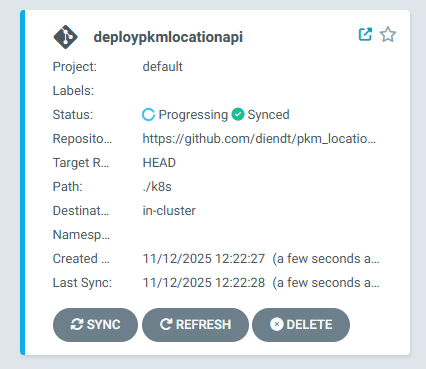
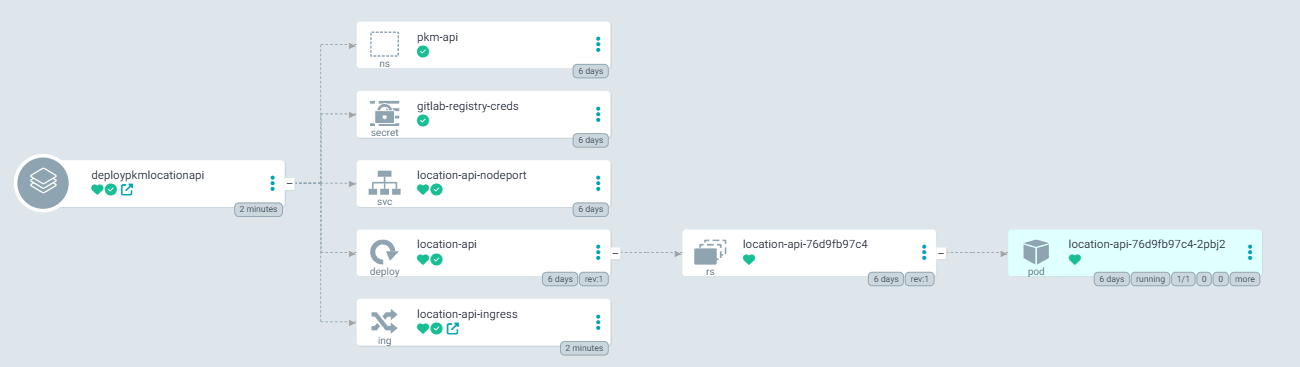
Đến đây đã deploy xong